
Guiding
Although still new, this section will contain information on our experiences with guiding.
Another area of neglect! Guiding once understood is really quite simple. Here is an excerpt from the manual I wrote available from Tech Info for Download.
Depending on your setup you may have a need to guide your images. Guiding is a process that helps compensate for defects in your scopes gears and alignment by correcting the scopes position every few seconds. You select a star to train your guiding device on near the target you are trying to observe and use the guide feature in your image software to track it.
The guide chip in the ST7 can independently track a guide star while your main chip is imaging the target. The guide chip takes a short exposure and notes the guide stars position. It then takes another picture and tracks the movement. If the star has moved the program sends the correction to the scope which makes a miniature slew to correct for the movement. It will continue to do this throughout the entire time you are imaging your main target.
To setup guiding you'll need to know a few things first. In The Sky you may have noticed that above the main field of view indicator there is a smaller box. This smaller box is the field of view indicator for the guide chip. To setup guiding you will want to place a fairly small bright star in the guide chip FOV indicator.
If you do not have a field of view indicator, see the manual for setting one up. You can access the feature through the view menu in The Sky. Because the exact focal length may vary slightly, it is best to take an image and then adjust the height and width of the FOV in the properties until it matches your image.
In CCDOps select Calibrate from the Track menu. This will present you with the following dialogue.
| ||
| ||
| ||
| ||
| ||
| ||
| ||
|

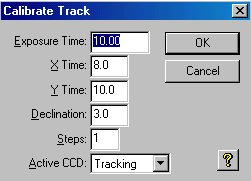
In this menu there are some values that need to be set.
The first is the exposure time. You can play around with this value, but to start set it to 3 or 4 seconds.
The next values are for the X and Y axis's. You can try 6 in the X value and 8 or 10 in the Y value. The other box is for the declination. Simply hover your mouse pointer over the star you are guiding on in The Sky, and look at the DEC value as described in the previous chapter and enter that value into the box. The value can be a close approximation, as this doesn't seem to really be critical to the successful completion of calibration.
Once you have entered the values you can click on Calibrate and see if it works. The guide chip will take a series of pictures and track the movement of the guide star and assign correction values for future use in correcting scope error.
If the process breaks and gives you a movement error, slightly slew the scope so that the position of the guide star is closer to the center of the field of view. You may want to take an image with the main chip and insure you are actually where you think you are.
If you are certain that the guide star is perfectly centered, there are some other things you can try. Find a guide star that would stand by itself in the guide chip FOV indicator. Try again.
If this fails you can adjust your X and Y times up and down. Remember though, they always need to be greater than the exposure time for calibration to work.
If you have excellent polar alignment and have setup PEC or SMART on your LX200, it may be difficult for you to guide. In this case you may need to increase the values considerably so that the scope can have time to produce an error that the guide chip can detect. As a general rule of thumb, you will usually have less error in Dec, and therefor need less time than the Y.
Once you have a successful calibration you can try long guided exposures. You do this by selecting Selfguide from the track menu or toolbar.
Enter in your Dec and exposure time and your off. If you still notice a lot of slop you can re-calibrate, change the X and Y values, or it could be that it is windy out and that your scope is being blown around.
Once you have mastered calibration you will be able to take long guided exposures which can greatly assist you in recovering your asteroids when they get fainter.
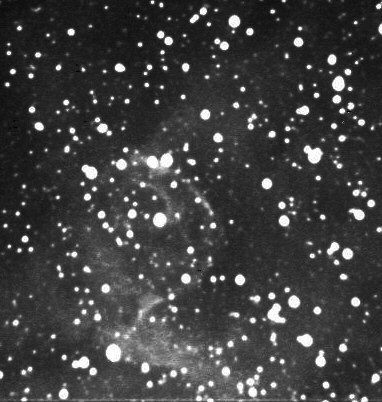
Thors Helmet
452 L minutes Stacked
ST7e & CFW8 LX200 10" @ F4.1 Nov 11 , 1999 G&M
The following was in response to a question about guiding in Maxim Dl an how it works accross series and with Darks.
Your questions can be answered differently depending on whether you have two separate cameras or a built in guider. Obviously if they are two distinct cameras the shutter question doesn't apply as yes, it will stay open continuously on the separate guide camera.
I suspect your question relates to a built in guider. While I have never actually considered the question I can tell you that in a series of images the shutter closes while an image is downloaded, it opens again for the next exposure, requires the guide star which will not have drifted much during download, locks on and takes the next exposure. This continues until the series completes and when the main chip is at rest the shutter opens again to allow the camera to continue guiding again off the guide chip.
I imagine it resets the main chip prior to taking another image or initiating a new series.
One you lock a guide star though, it will keep it until you tell it to stop. I often forget to stop guiding when I slew to the next object and have to stop it after I slew.
Hope that answers the question. BTW, I love this feature as I often launch long series and am able to simply walk away and find my images when I return. This also works with Color Filter wheels, changing the colors between exposures for you and then continuing. Very handy for color work allowing you to easily acquire 100's of images to be stacked.
On the dark question it fails to take a dark in my config as it wants to keep the shutter open for the guiding. I have to stop guiding, take the dark and then guide again.
Track and Accumalete
Gina and David Hudgins took these using the track and accumulate feature from CCDOPS. These are images are generally 30 seconds each.
Monday October 4th, 1999
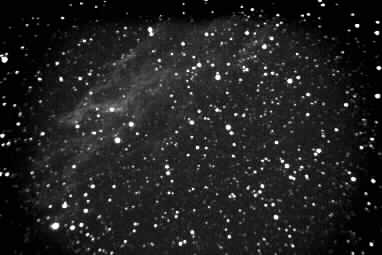
NGC 6992 2 images x 30 seconds
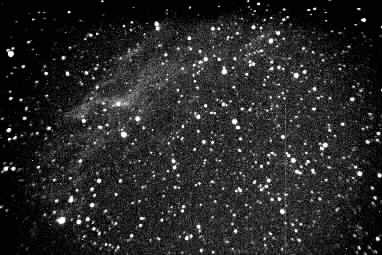
NGC 6992 1 image x 60 seconds
These two sets can help serve as a comparison between the Track and Accumulate feature and simple Self Guiding in CCDOPS.
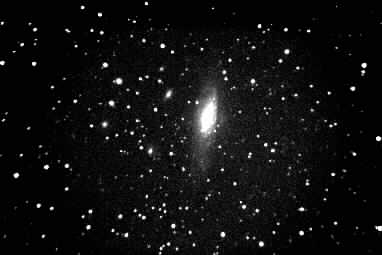
NGC 73312 images x 30 seconds
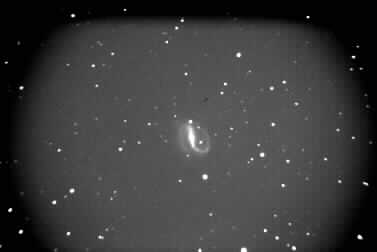
NGC7479 12 images x 30 seconds no flat correction
[Everstar] [Staff] [Gallery] [Astro Links] [ESO Info] [Tech Info] |
EverStaR. Copyright KC Resources