
Color Imaging
Warning, this page loads slow!
Color Imaging is an art, and as you will see here, we haven't mastered it yet. Our first attempts though weren't bad all being considered.
There is a science to knowing the correct exposure lengths for the various colors. Our first attempts seemed green rich and rather red poor.
We also learned quickly from grolleg on Sciastro IRC (Both, a valuable resource I might add) that your focus changes as you use each color. This will drive us back to solving the motofocuser problem pretty quick. Since there are different ways to achieve focus, move the mirror or move the camera, we will have to be careful about focusing. Stay tuned as this section will keep growing over time!
| ||
| ||
| ||
| ||
| ||
| ||
| ||
|


Product Selection
Having tried to research color solutions and vignetting problems I became aware of another possible product combination. Optech makes a color filter wheel with 2" filters that can work in conjunction with a 3.3 focal reducer.
Someone following that road might be able to provide feedback on it.
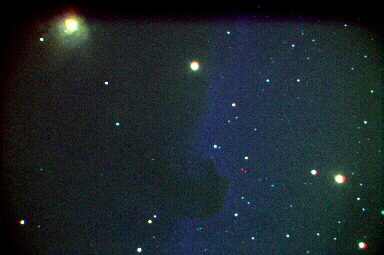
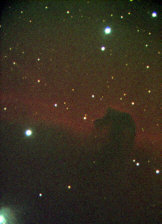
Horse's Head R30G30B30
ST7e & CFW8 LX200 10" @ F3.3
October 10, 1999 G&M
Blue and green seem to have taken over in this image despite their equal expsoure times with red.
This was solved by simply reprocessing the image while I was awake. It helps to tell the computer when red is really red and blue is really blue. Dohhh!
The resulting image here was processed in Micrografx Picture Publisher using the color map feature, green was reduced and red was increased, however this image isn't even close to it's true color which should have red as the domininate color. I beleive we will use this object again to try and work out the bugs.
This image was also processed using Picture Publisher to balance green and red. This one came out all right for being our first image. The master control was also tweaked to darken the over all image. Picture Publisher is a nice fairly inexpensive package for image processing and has worked well for us.
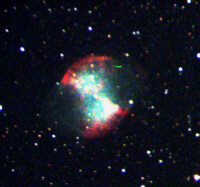
M27 R120G120 B120
ST7e & CFW8 LX200 10" @ F3.3
October 10, 1999 G&M
Update 12/10/00
A year has passed since I last visited these pages and my skills with color have only imporved a bit.
Here are my tips in summary:
Stack them High!
Rather than take long shots where saturation and blooming occur find and exposure time that defeats these negative attributes and take many at that length. Some of the people that are getting the best results often have 100's of images in a single picture. If you don't have the patience for this, them my gallery is a good example of what you'll end up with, lots of grainy looking pictures.
Use Flats
I have neglected flats in much of my work, see the section on Focal reduction for examples of what you leave in your image if you fail to use them. Failure to use them can result in graininess and uneven color.
Color
Process your blues carefully, they will cause halos in your brighter stars. Use a package like Maxim DL to help you reduce this attribute.
Buy Maxim DL! Its a fabulous package and in itself can improve your work with it's abundant features
Use color balance after combining to adjust your colors to the proper level and to scale your white.
Guiding
Make sure its tight! If longer guides cause drift, shorten your exposures or find the source of your error. Some of my best images were actual unguided. Both of these were unguided.
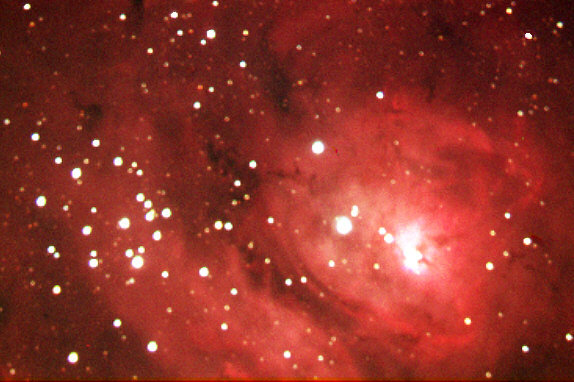
Lagoon Nebula
R120 G120 B240
ST7e & CFW8 LX200 10" @ F4.1 May 15, 2000 from Powell G&M
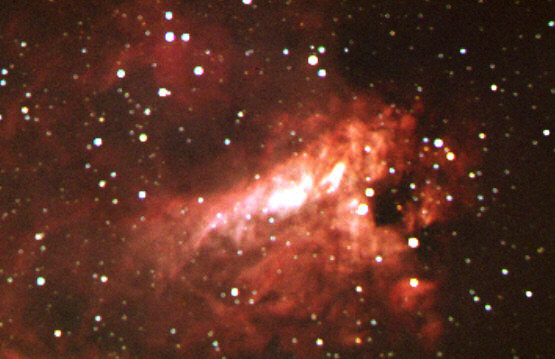
Omega Nebula
R120 G120 B240
ST7e & CFW8 LX200 10" @ F4.1 May 15, 2000 from Powell G&M
Dark Skies
The two images above were done under moderately dark skies where the visual limiting magnitude was about 5 to 5.5
Many defects will go away just by virtual of clear dark skies, less processing is needed to overcome mother earths atmospheric distortions.
Alignment
Take considerable time to insure when you are stacking images that they line up. The better they align, the better they are.
Processing
After working with images in Maxim, I useally take them into a paint package like Micrographics and Photoimpact and use the special effects and filters to help further refine the images, and to remove a halo or two. It's cheating but it helps. You'll have to determine how far you go in altering your image. There is a line somewhere between technique and transformation or art.
The color adjustment sliders and tone adjustments can literally perform miracles. I look at other peoples work on the net to get an idea of what the colors are like and adjust accordingly with the majority.
[Everstar] [Staff] [Gallery] [Astro Links] [ESO Info] [Tech Info] |
EverStaR. Copyright KC Resources